Alps SKCM/SKCL Switch Guide
Keycap pulling
There is only one consistently safe way to pull Alps common mount keycaps. You should not attempt anything else, as plastics involved can be quite brittle/old, or in the case of DCS keycaps the mold can sometimes lack supports.
Use a high-quality wire keycap puller only. The weirdly shaped ones that come with some cheaper Chinese keyboards aren’t a good shape for pulling Alps caps. Plastic ring-type pullers should not be used due to likelihood of breaking or scratching keycaps.
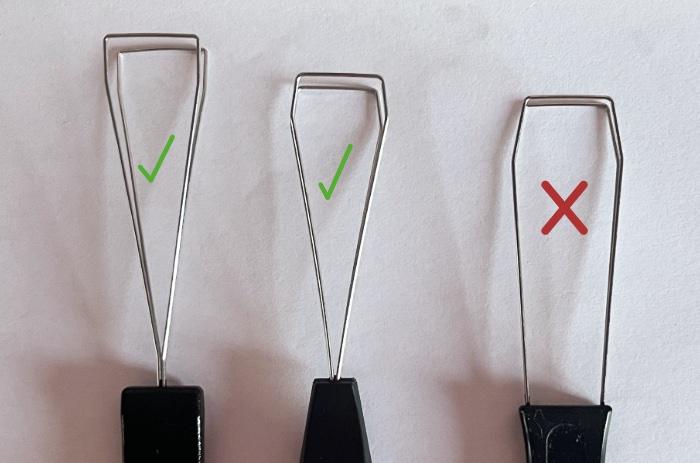 Get a good grip around the keycap with the wire puller and pull straight up. Do not wiggle, tease, rock side-to-side or impart any lateral movement at all. If the keycap has a death grip, continue pulling straight up and simply apply more force until the keycap releases.
Removing broken stems
The worst has happened and despite following the above guide, a keycap has died and the mount is now stuck inside the switch stem. How to get it out?
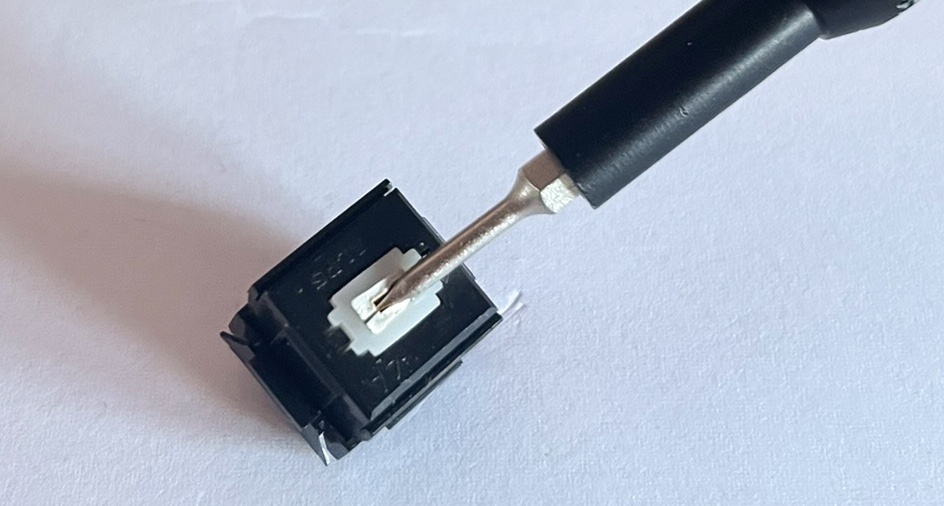
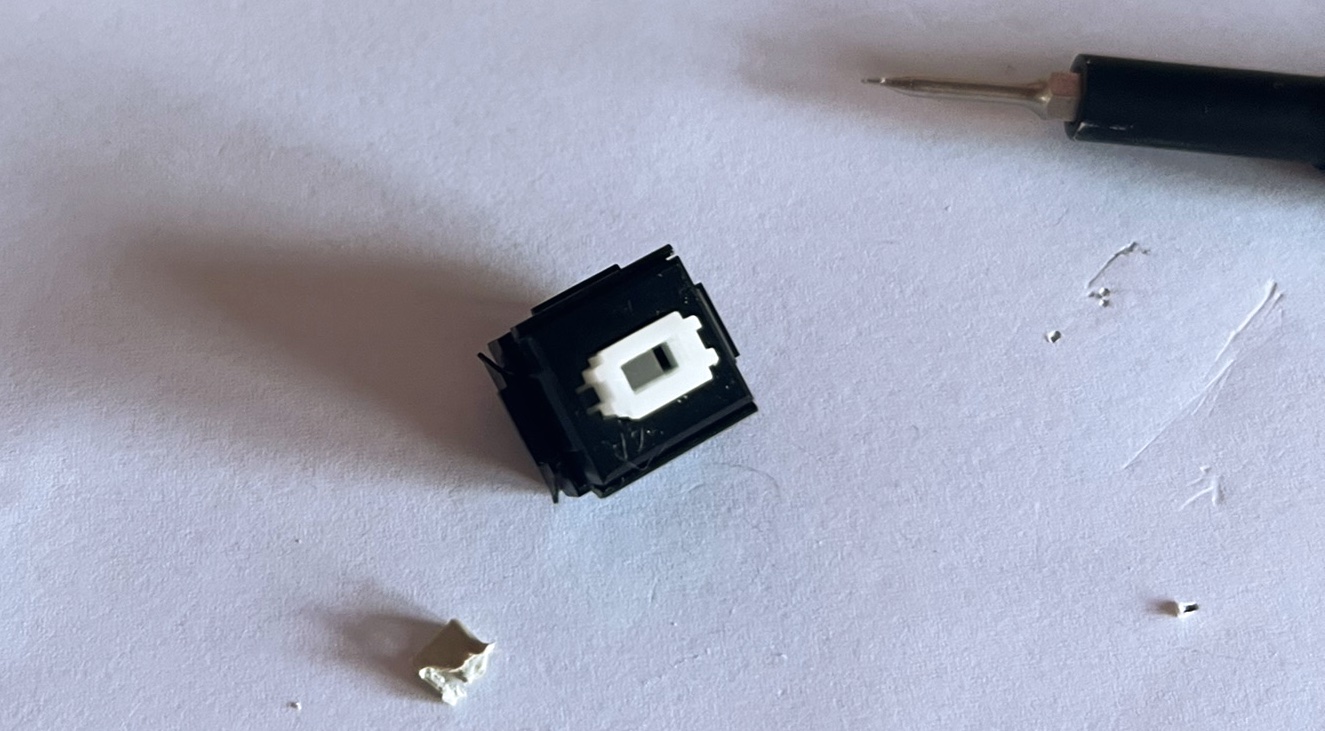
Usually, if this has happened the plastic is quite brittle or soft, so trying to push it up from inside the switch stem like some guides say will probably be fruitless. The most foolproof way to extract the stem (though it will rarely be in any sort of condition to attempt a keycap repair) is to insert a very small flathead screwdriver into the slot and lever out the broken plastic.
If you want to keep using the keycap that broke, you should seriously consider simply gluing the keytop back on. If you want to feel better about it, just know that it’s Canon’s official method of removing and replacing Alps keycaps.
Switch disassembly
Alps switches can be opened by releasing the two retaining tabs that are part of the bottom housing from the spots they latch into in the top housing. There are two main methods to achieve this.
Out-of-plate: This is by far the easiest way to disassemble SKCM/SKCL switches in bulk, and requires no tools other than a soldering iron. Desolder all the switches from the board, and then pull each tab back with your fingernails. Put a little pressure on the contact pins with your thumb and the switch will pop apart.
In-plate: You can also release the tabs without desoldering, though reassembly is much more difficult this way. Using two long flat objects1), insert one into each of the tabs. You can then pull outwards and upwards to simultaneously release the tabs and pull up the top housing. Remove the parts with your hands.
Switch reassembly
Out-of-plate: Start with the top housing. Turn it upside down. Locate the flat, inside face of the top housing that isn’t smooth.
Put the stem into the top housing with the notch (if applicable) facing this side of the housing. Insert tactile or click leaf (if applicable) into the smooth side of the top housing. Place the spring onto the peg in the switch stem.
If your contact module is separated from your bottom housing, you can insert it into the top housing now, and then lower the bottom housing over the top. If it’s not, you can insert both pieces at the same time, taking care to make sure the contact module has engaged into the slot in the housing for it. If your switch won’t go back together, don’t force it - you have probably mixed up the sides for the contact module and tactile/click leaf.
In-plate: The easiest way to do this is to follow the out-of-plate guide above, but then turn the entire keyboard upside down and click the filled top housing in from below. It’s possible to do this the other way around though, but it’s significantly more fiddly:
- Place tactile/click leaf if applicable
- Balance the spring on the peg in the center of the bottom housing, inbetween the contact leaf spring and the tactile/click leaf spring.
- Lower the switch stem onto the spring, making sure the notch faces the contacts
- After orienting it properly, attempt to gently lower the top housing on top, making sure the stem goes in and then push down.
- Test the switch. If it crunches you did it wrong and should take it back apart immediately and re-attempt this.
As you can see, trying to do this from the top down is significantly more difficult and should really only be attempted if you’re not having any luck with the other method.
Fixing stuck/chattering contacts
The best way to fix an unhappy contact module will always be replacement with a better one - but there are some easy tricks to try if a switch has recently died or isn't working after a while in storage. As a first port of call, you should try pressing down very hard on the key and wiggling in a north-south direction. If the switch is chattering, do this until the switch is outputting one character on every north wiggle. If it wasn't registering, wiggle until it does.
Stabilizer tuning
Alps stabilizers are pretty simple, and while rattly nowadays were originally factory lubricated and quite quiet. They’re also significantly easier to tune than MX-type stabilizers.
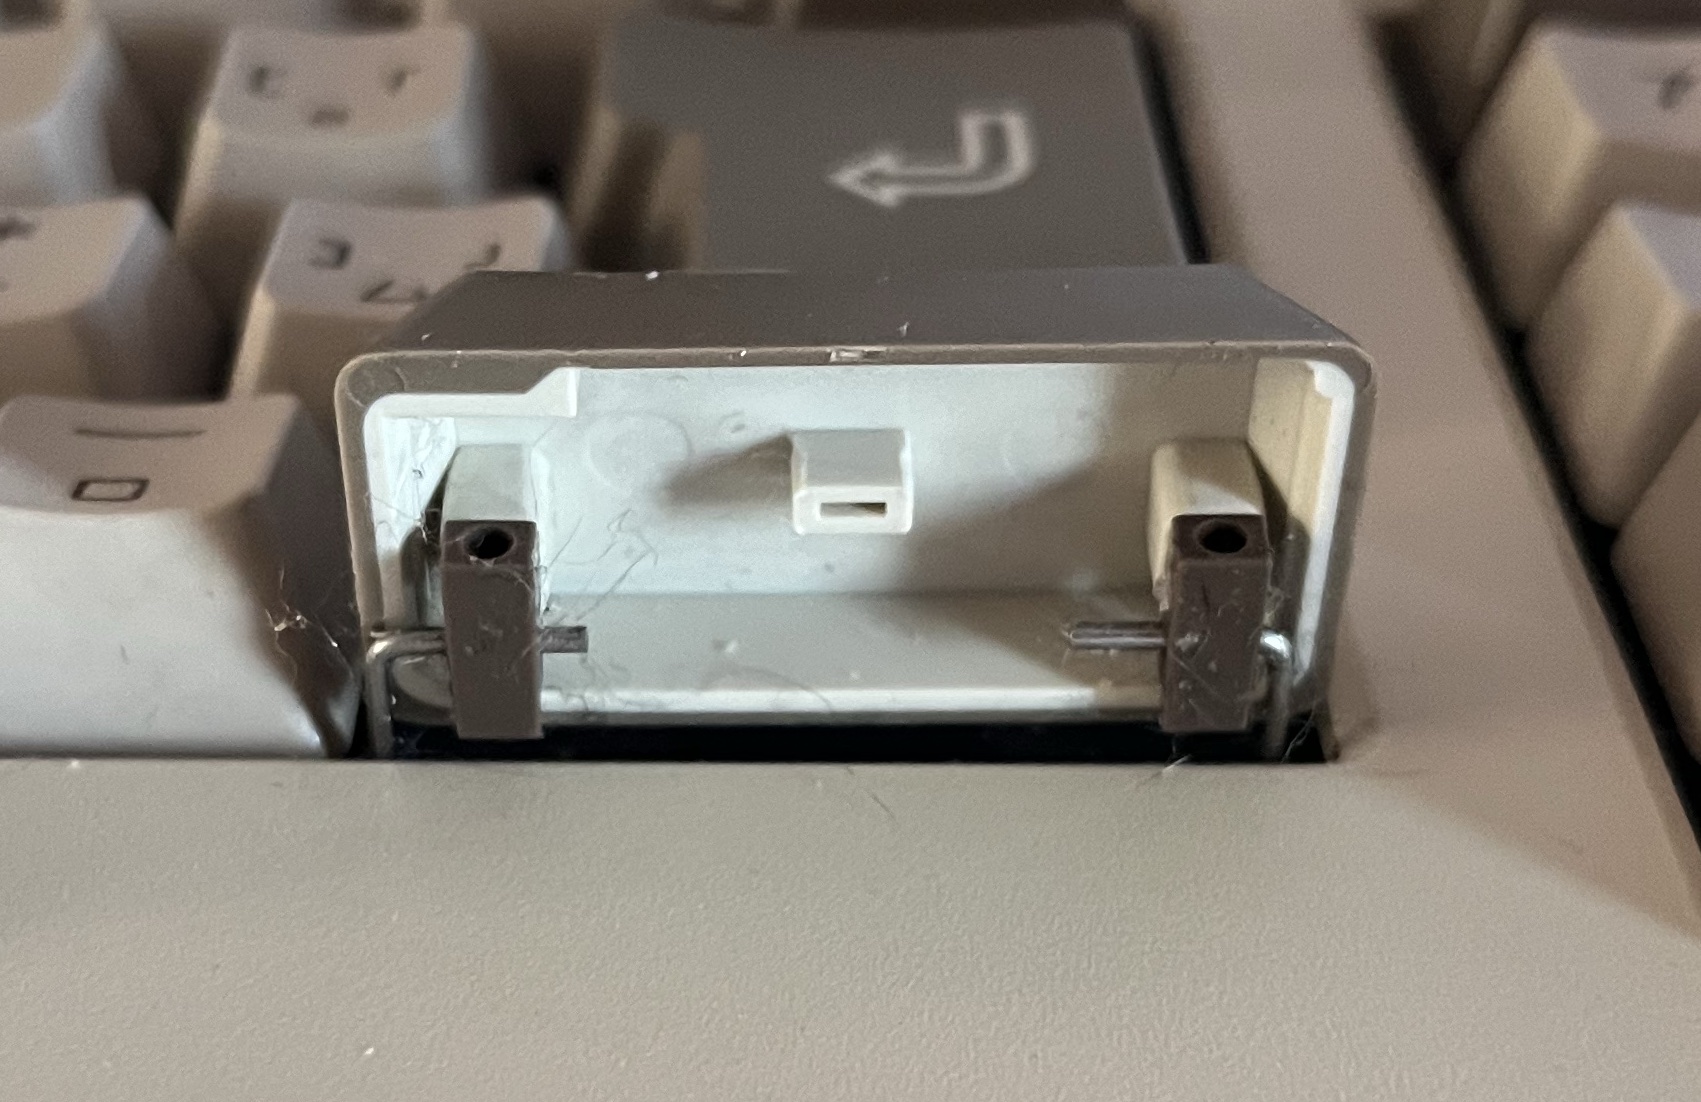
Pull the keycap and flip it over. There are two inserts in the keycap that hold the wire. Lube these well with silicone grease or another thick lube. Something like Krytox won’t really cut the mustard.
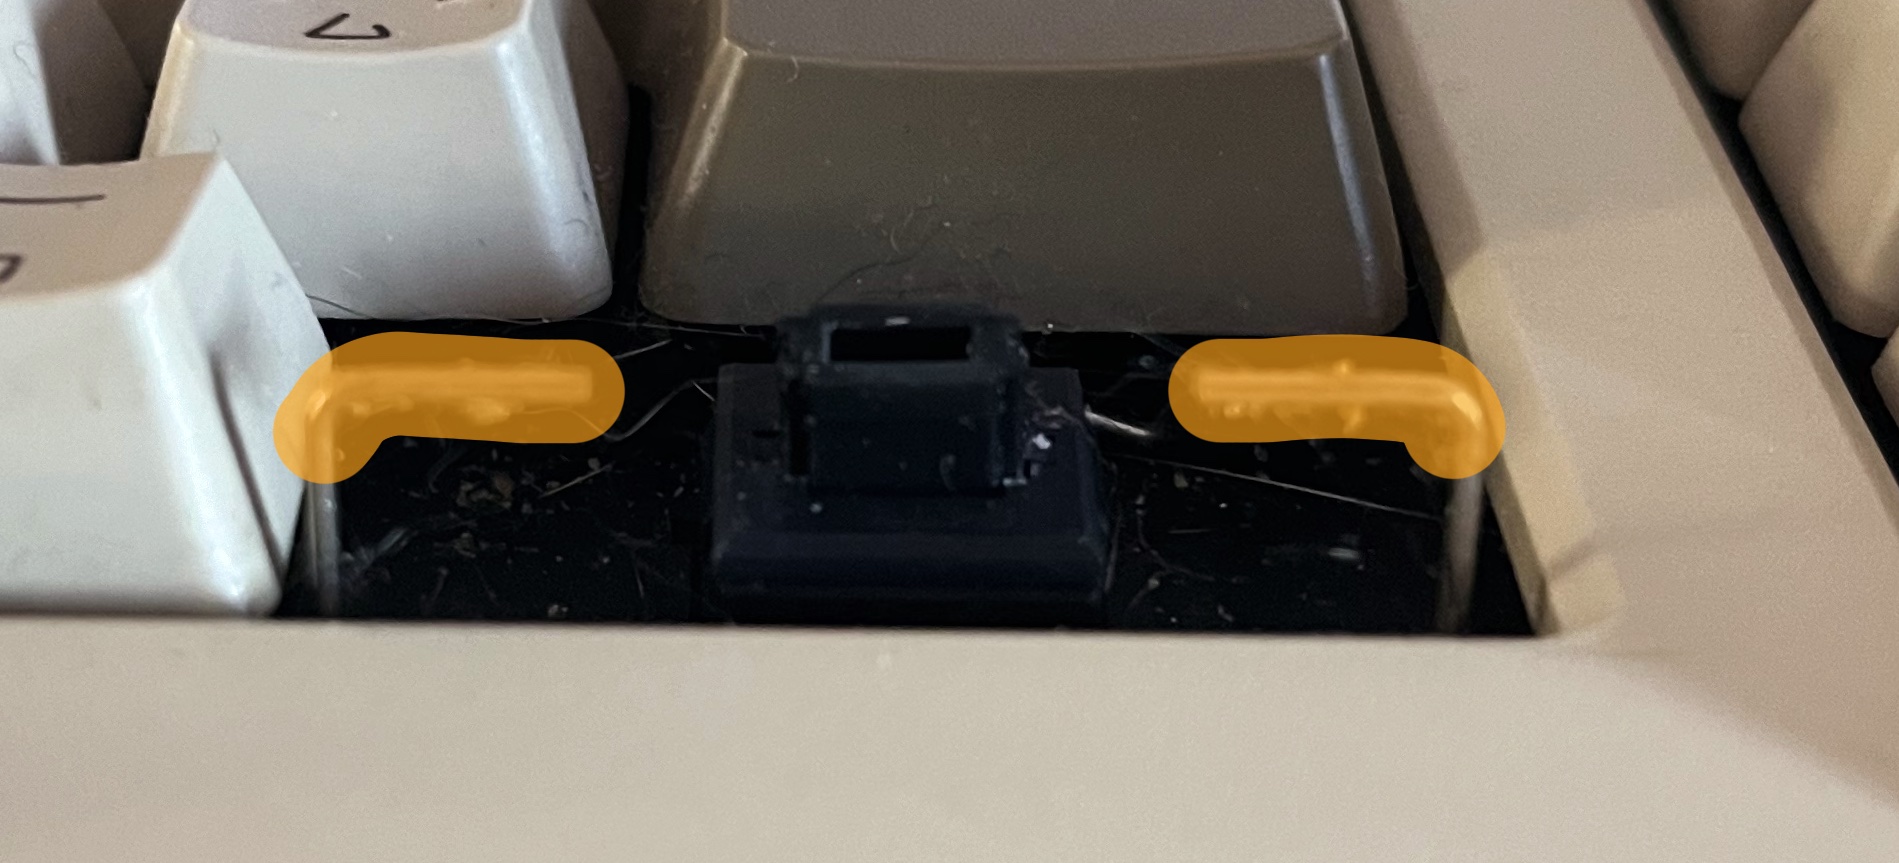
Flick the wire up while it’s still attached to the clips in the plate and lube the spots highlighted with the same lube you used for the keycap inserts.
Hook the keycap onto the wire and then lower down. Stab tuned, easy and simple.
Cleaning / Restoring / Waxboiling
This has been tested on Alps SKCM, SKCL, SKCC and SKFL. It really works. Restoration is significant. If the switches are only a bit bad, you will get top tier results. If they're super bad, they will become very usable. Word of warning: Don’t put 3rd generation Alps switches (SKCM without the slits/SKBM) on the stove. The housings are made of ABS and will likely soften/melt.
Instructions
- Boil top housings and sliders, any amount of time over a minute is fine. Stir occasionally.
- Scoop some wax out of a tealight (less is more, there is no specific amount required) or put Sasol 5203 pellets into a container, put sliders in, pour boiling water over, stir occasionally
- Alternatively, you can do the waxboil step in a pan full of boiling water (stove off) and use a strainer to dip the switches into the waxy water
- Dry everything and put switches back together. (Do not rinse after waxing!)
For further information, check out the Waxboil FAQ.


